Overview
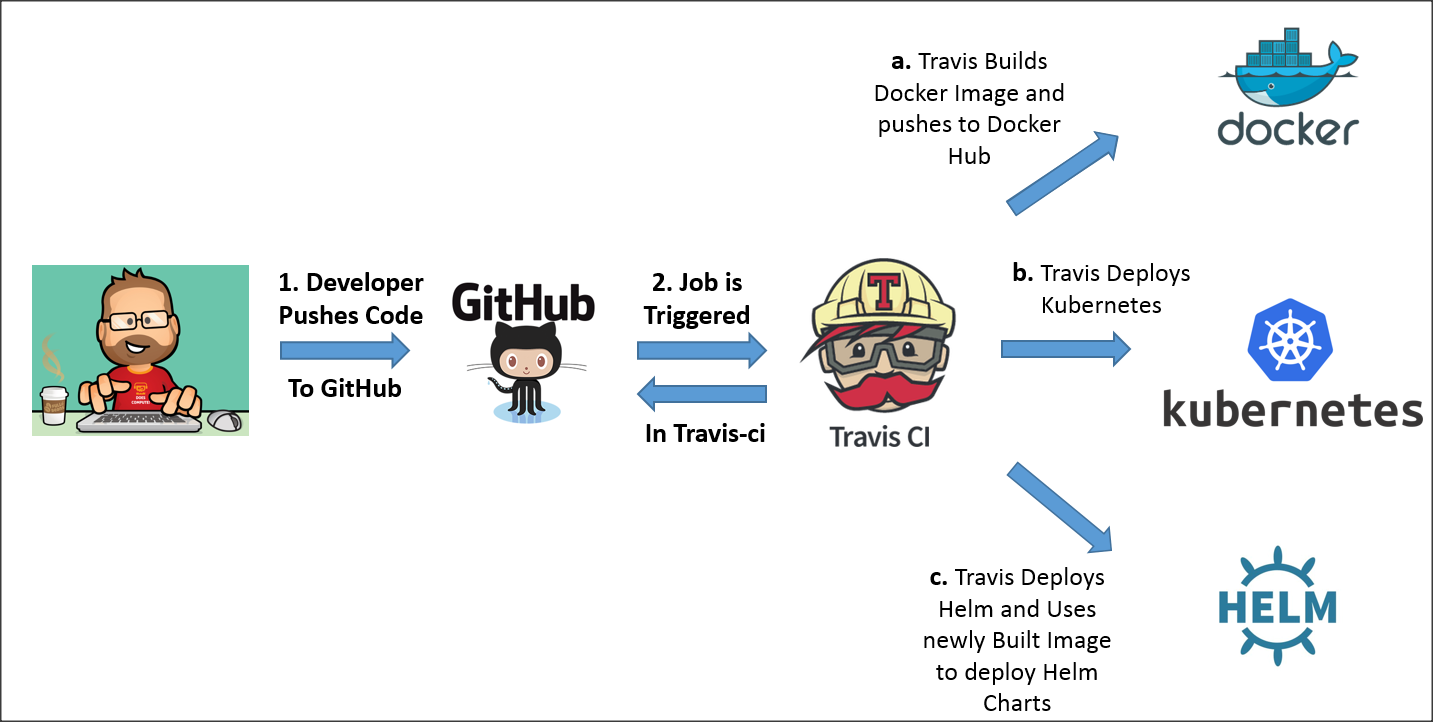
In this post, we will go through the process of Building and Publishing Docker Images and deploying the newly created Docker image using helm charts in Kubernetes environment. All these processes would be triggered by travis-ci once you push the Docker Image. For every Job triggered, travis-ci spins a new Instance for executing the flow defined in .travis.yml
Goal
Creating a pipeline for building and deploying docker images.
Prerequisites
To start using Travis CI, you need to have:
- A GitHub account.
- Owner permissions for a project hosted on GitHub.
- Account and Docker Repository in DockerHub.
Getting Started
- Navigate to Travis-ci.com and Sign up with GitHub.com
- Accept the Authorization of Travis CI. You’ll be redirected to GitHub.
- Click the green Activate button, and select the repositories you want to use with Travis CI.
- In your GitHub repo, create a file called
.travis.ymlto tell Travis CI what to do.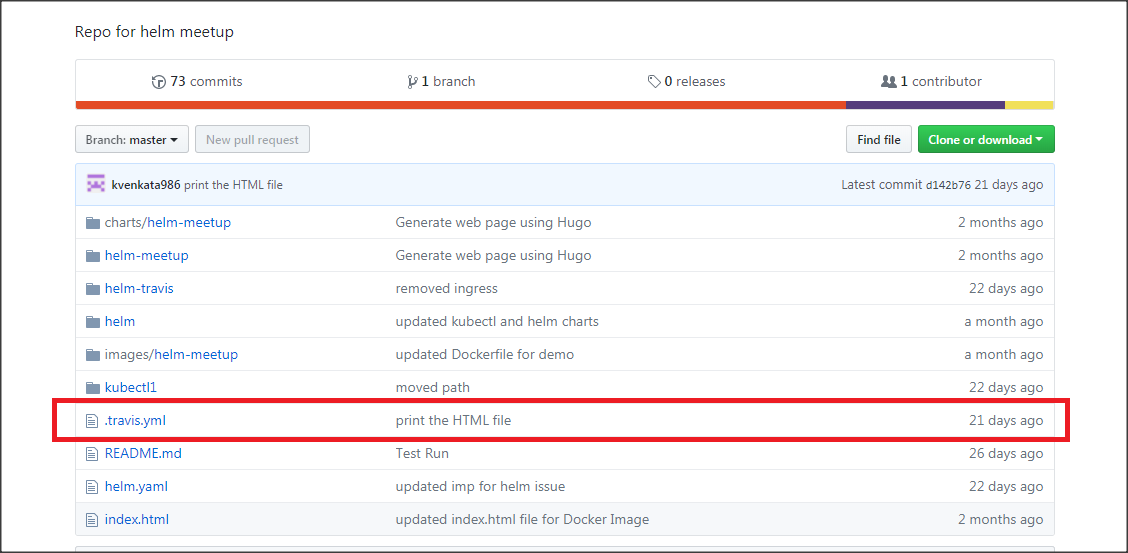
- Add below contents to
.travis.yaml
The below .travis.yaml tells travis-ci
- To create an instance of distribution
xenial[ Ubuntu 16.04 ]. - Install
Docker, So you can add docker commands to your builds. - In
before_script:section, we specify the location of our DockerFile. - In
script:section, we specify the repo name in dockerhub. In
after_script:section, we are installing Kubernetes, Helm and Installing our Helm Charts.dist: xenial sudo: required services: - docker env: - CHANGE_MINIKUBE_NONE_USER=true before_script: # Build Docker Image - docker build -t kvenkata986/welcome images/helm-meetup/. # Path to DockerFile script: # Publish Docker Image to Docker Hub - docker images kvenkata986/welcome - if [ "$TRAVIS_BRANCH" == "master" ]; then docker login --username="$DOCKER_USER" --password="$DOCKER_PASS"; docker push kvenkata986/welcome; fi after_script: # Install Kubernetes - curl -Lo kubectl https://storage.googleapis.com/kubernetes-release/release/v1.9.0/bin/linux/amd64/kubectl && chmod +x kubectl && sudo mv kubectl /usr/local/bin/ - curl -Lo minikube https://storage.googleapis.com/minikube/releases/v0.25.2/minikube-linux-amd64 && chmod +x minikube && sudo mv minikube /usr/local/bin/ - sudo minikube start --vm-driver=none --kubernetes-version=v1.9.0 - minikube update-context - JSONPATH='{range .items[*]}{@.metadata.name}:{range @.status.conditions[*]}{@.type}={@.status};{end}{end}'; until kubectl get nodes -o jsonpath="$JSONPATH" 2>&1 | grep -q "Ready=True"; do sleep 1; done - kubectl cluster-info - JSONPATH='{range .items[*]}{@.metadata.name}:{range @.status.conditions[*]}{@.type}={@.status};{end}{end}'; until kubectl -n kube-system get pods -lk8s-app=kube-dns -o jsonpath="$JSONPATH" 2>&1 | grep -q "Ready=True"; do sleep 1;echo "waiting for kube-dns to be available"; kubectl get pods --all-namespaces; done - kubectl get nodes - sudo apt-get install -y --upgrade util-linux socat # Install Helm: - wget https://storage.googleapis.com/kubernetes-helm/helm-v2.10.0-linux-amd64.tar.gz - tar -xvzf helm-v2.10.0-linux-amd64.tar.gz - sudo mv linux-amd64/helm /usr/local/bin/helm - helm init - kubectl delete deployment tiller-deploy --namespace=kube-system ; kubectl delete service tiller-deploy --namespace=kube-system ; rm -rf ~/.helm/ - kubectl create -f helm.yaml - helm init --service-account helm - sleep 20 - kubectl get po --namespace kube-system # Deploy Helm Charts. - cd helm-travis - helm install . --name my-first-helm-chart # Use your Helmcharts - helm list
Successful Execution

Share this post
Twitter
Google+
Facebook
Reddit
LinkedIn
StumbleUpon
Pinterest
Email